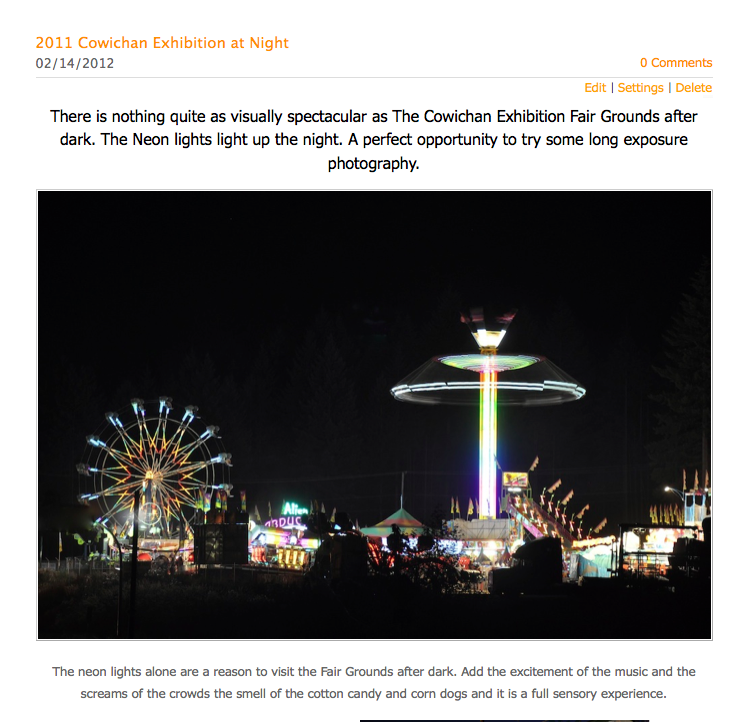
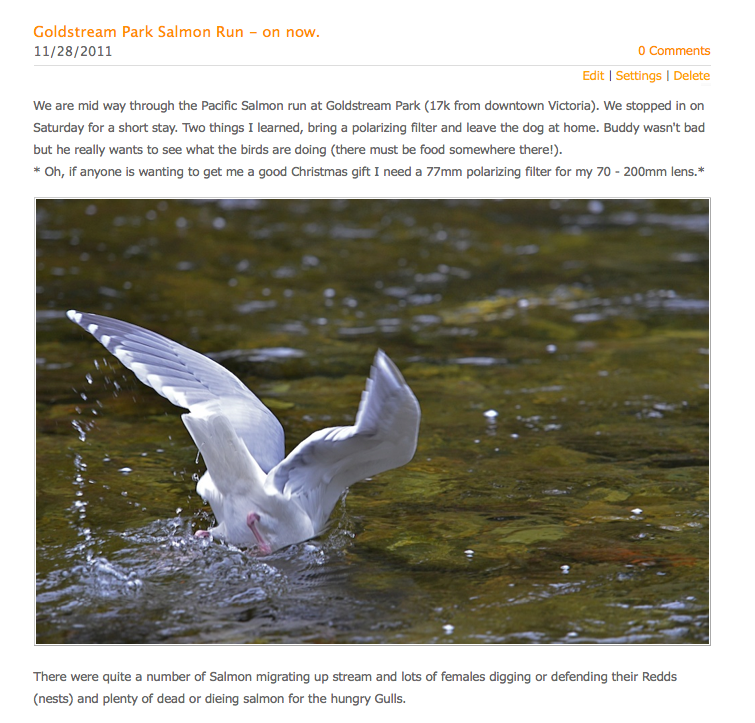
Why do some of your photos turn out great and others don't look
good at all. It could be the light you are using not your camera.
good at all. It could be the light you are using not your camera.

Here are two images of the same place taken around the same time on different days,
it really shows the power of light.
it really shows the power of light.

As an Event Photographer I sometimes have little choice in the light I am able to use.
What I do have is the ability to use the available light to my best advantage.
Sometimes it works sometimes, not so much.
Here are some tips to help you shoot better photos.
What I do have is the ability to use the available light to my best advantage.
Sometimes it works sometimes, not so much.
Here are some tips to help you shoot better photos.

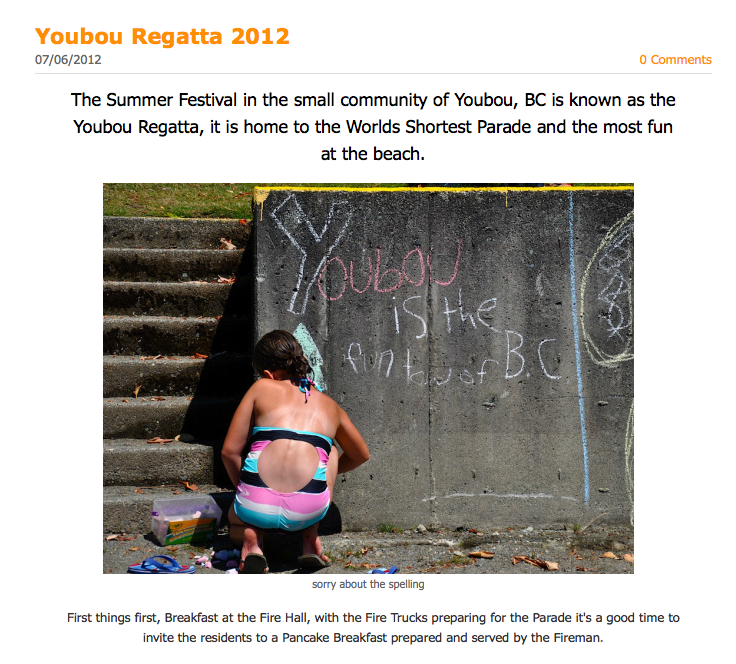
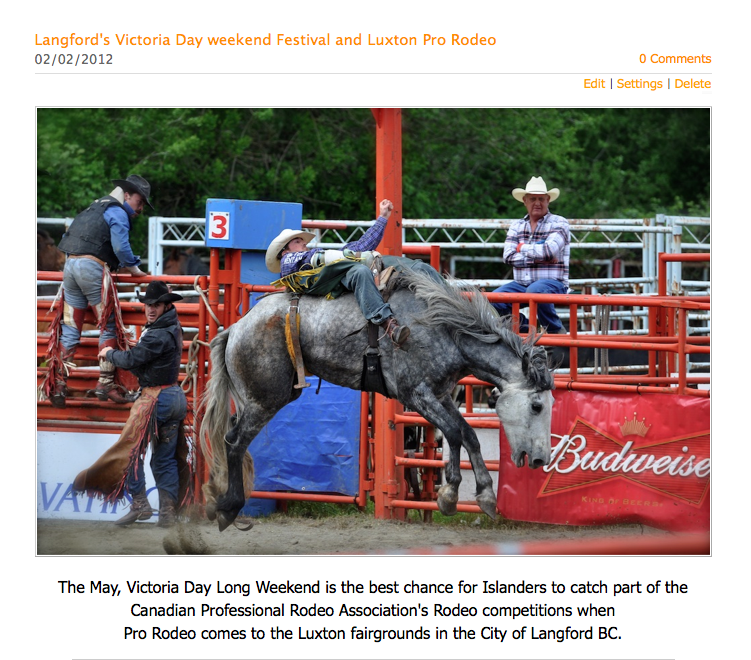
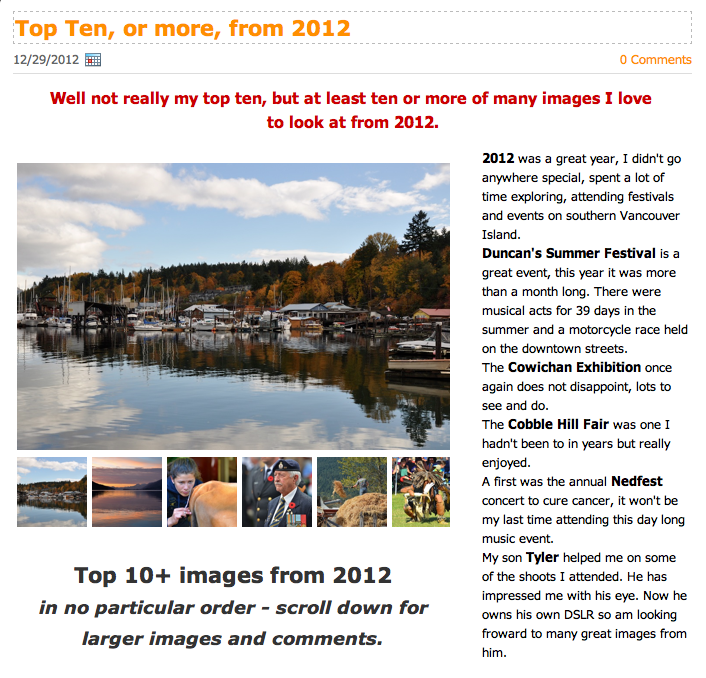
Some of the events I shoot are all day long and outside. Fortunately there is a variety of
ways to use this light to your advantage. Positioning your camera can be one of the most
important things you can do to improve your photos. The photo above is a good example
of shooting at noon on a cloudless sunny day. I have positioned myself (the camera operator)
to use the sun as back or side lighting. Avoiding direct light and shadows on the faces.

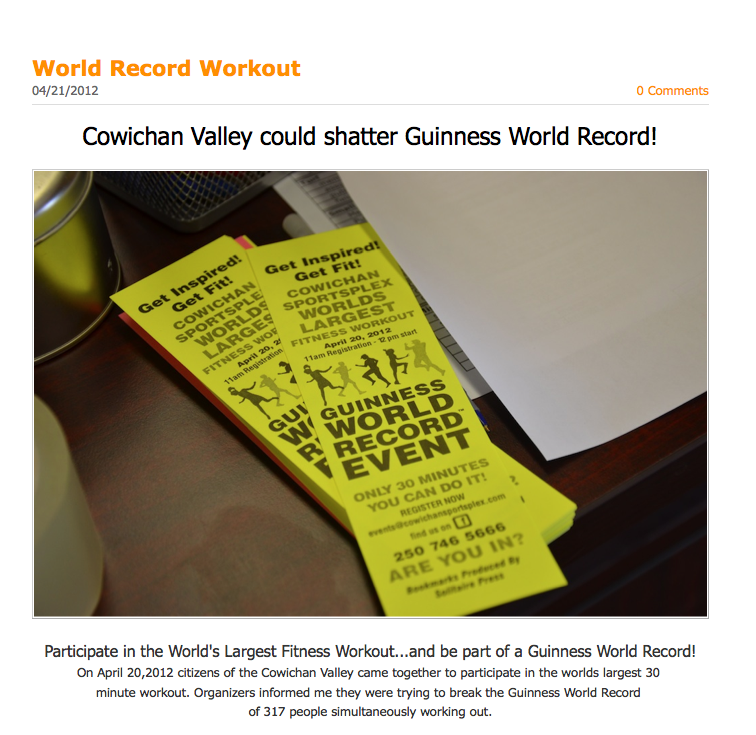
Shooting in direct sunlight.
You might think "Hey, the more light the better" but that is not always true. The opposite of light is dark
and the more light you have on your subject will also produce darker shadows where the sunlight isn't.
High contrast between light and dark does have its place in photography, mostly horror movies though.
The dark shadows under the eyes, nose shadows, also the hot spots on the bridge
of the nose and forehead are never flattering.
Try not to shoot your subject looking directly into the sun, have it come from behind
or just off to the side and bounce light to the front or move out of the direct light and
in to a shaded area.
You can bounce light with a "reflector" of some type.

1/160 @ f3.2, ISO 800
Shooting in shade.
Shade allows you to balance or flatten the light that hits your subject, it reduces the contrast between the light
and dark on your subject. When you have your subject in the shade watch your backgrounds, the amount
of light hitting the background can become over exposed and distracting.
Shade allows you to balance or flatten the light that hits your subject, it reduces the contrast between the light
and dark on your subject. When you have your subject in the shade watch your backgrounds, the amount
of light hitting the background can become over exposed and distracting.
| In the shot on the right the camera wants the aperture to close because of the white truck. In the shot next to it we have hidden the truck behind the head to allow better exposure on the subject's face. If you look at the truck you can see how blown out it is (the white is over exposed and lacks definition) but because it is mostly hidden behind the head in the second shot it doesn't matter that it is over exposed. |  |
Look for a solid shady area with no pools or shafts of light, let your camera's aperture open up a
little more or use higher ISO speed.
ISO is how sensitive your film or Digital Image Sensor is to light. It is expressed as 100 - 6400+.
Your image can be adversely effected by very high ISO though. Try to stay under ISO 800 or use more light.
little more or use higher ISO speed.
ISO is how sensitive your film or Digital Image Sensor is to light. It is expressed as 100 - 6400+.
Your image can be adversely effected by very high ISO though. Try to stay under ISO 800 or use more light.

1/160 @ f3.2, ISO 800

Cloudy/Overcast light.
Living in BC it feels like we have more overcast days than bright sunny days so we have to be able to shoot on
those days. On overcast days light is flat even light, it produces very little shadow. It can however
appear stronger from different angles. When you are shooting have your subject turn and watch where
your lighting is best.
An overcast sky can be very bright so be careful with your backgrounds and how much sky
you include in your photo.

Using your main source of light as Backlight.
Backlight can be your friend, if you use it right. It helps provide separation between subject and a background.
It rounds out your subject, provides some depth. It's like a little 3D effect.
When using backlight be careful, you don't want to underexpose the front of your subject so
take your meter readings from your subjects face where the sun is not reaching.
If you can, use a reflector to bounce light to the front.

Using reflectors or "bouncing"
puts the light where it needs to be.
I like to use strong light as backlight, mostly for the ability to provide the separation from background and
it offers me the ability to redirect the light to the front of my subject(s). In the portrait above (check the
inset photo), you can see in her glasses the reflection of the (Foamcore/whitebord) reflector or Bounceboard.
The sun is over her left shoulder and bounced back off the whiteboard that is to her right.
This will remove shadow from under eyes, nose and chin.
You can almost use anything white to bounce light in bright sunlight. A white car, the white
lid on a Styrofoam ice chest, a white towel even a news paper will bounce light. Make
sure it's white not colored so you are not reflecting color on to your subject.
Professional reflectors come in white, silver and gold color. White Foamcore can be purchased at hardware
or building supply stores at a fraction of the price. White or silver car window shades can also be used.

Sunrise, sunset, it's called the Golden hour for a reason.
As the sun rises or sets the angle of the light produced by the sun must travel through more atmosphere, clouds, particulates in the air (smoke, dust etc) it softens the light and reduces the angle of the light so it does not
produce those deep shadows under the chin and eyes. And generally gives off a nice soft glow or great backlight.
Plan your shooting just after sunrise or just before sunset on clear
days or evenings.

1/60@ f8 3200 ISO
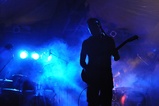
Shooting in Low Light.
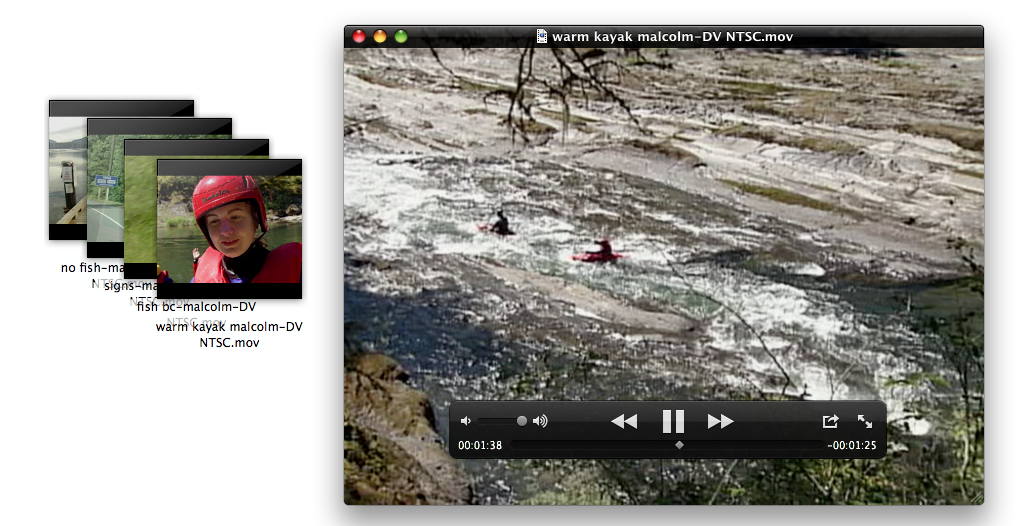
Shooting motion in low light is tough for anybody. When I needed to find a low light image I knew exactly
where to look for one. Tyler's wrestling tournaments are held in gymnasiums lit by sodium vapour or florescent
lights. High ISO, large apertures and slow shooting speeds are what you are going to have to face.
The way to counteract these hurtles are "fast" lenses (ones that open f2.8 - f1.4), use the image
stabilization in your camera or on your lens, monopods or tripods and that dreaded flash all help.

Shooting in Mixed Light.
Often you will find yourself taking photos inside near windows, you'll have the inside lights turned on, possibly
you are using your cameras flash as well. That is mixed light, three different colors of light to your camera.
It is almost impossible for cameras to white balance for multiple light colors.
What is Color Temperature?
Check this website for a good explanation of color temperature and how your camera handles it. http://www.olympusamerica.com/crm/oneoffpages/crm_whitebalance.asp
Check this website for a good explanation of color temperature and how your camera handles it. http://www.olympusamerica.com/crm/oneoffpages/crm_whitebalance.asp
Light can actually be expressed as a Kelvin temperature; the temperature of the light can make it appear bluer or redder (see scale). Think of a reddish-yellow sky at sunset, while at noon the sky appears mostly blue. The white balance setting in your camera controls how the color temperature of the light source you are shooting under will be recorded either "cooler" (towards blue) or "warmer" (towards red"). Auto White Balance uses information from the scene and calibrates how a white object should appear under different light sources. While Auto White Balance works well for most situations, sometimes using one of the white balance presets — or if your camera supports it, setting white balance manually (One-touch) — will provide more accurate results. |  http://www.olympusamerica.com |
| You can buy color correcting gels to change the color temperature of your light to match your light source.  http://www.photographytalk.com |
Pick your brightest light source and try to get rid of or minimize the others.
If you can't only use one source use color correcting gel on your
flash to match your strongest light source.
You can also buy large sheets to cover windows but covering your flash is much cheaper.

Night doesn't mean no light. It just comes from different places.
Shooting at night has many challenges. It is harder to focus, get the right exposure, high ISO and
shallow depth of field (DOF). It does though put you in control of where and how much light you
can use to light your subject.
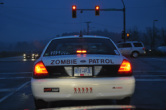
Here is where your light is coming from at night,
top photo - the moon,
centre - the subject has it's own light,
bottom - car headlights, large windows in buildings or street lights etc.
| Your on camera flash can be a bad choice for shooting at night the light dosen't go far so things in the foreground are too bright and the background is too dark. Faces tend to wash out because your camera is measuring a lot of black. If you really want to take a photo at night try and find a lit area that you can borrow some front/side light from and use that. If there is no other available light sources I have even used car headlights and bounce boards to help light subject and/or backgrounds. |  This is a photo from a point and shoot camera. Notice that the foreground and subjects are over lit and the background disappears into the black. In the second photo I am using the lights of the Space Needle as a background. This setup works because the lights of the Space Needle provide a background. The light from the flash is set at -2 power so as not to wash out the subjects face. |  |
Learn to look for these natural sources of light when shooting at night.

On camera flash photos.
Most cameras come with a flash either built in on they have a hot shot to attach one. In my opinion your
on-camera flash should be your last choice for lighting your photo. In provides flat lifeless light and harsh
shadows (like the mid day sun). If anything get the flash off your camera and move it higher and to the
side to help provide some modeling. Notice there is no dimension to this subject, it really does
look two dimensional and slightly too bright compared to the background.
| Here is a flash attachment I found recently, I am just starting to use it more now and I really like it. By turning your flash to the side 30- 90 degrees and bouncing the light off the white card it stops the flash from shooting directly at your subject and defuses the light. Using this little tool you can keep your flash on the camera when you are moving around and can't have it off camera. You can find many other flash defusers that help soften the light and the shadows they cause. Find one that works for you. |  |
 | Even in the daylight you can put emphasis on your foreground and subject, your background will be lit because of the daylight. |
With practice adjusting the light output of your flash and moving it off your
camera you can achieve better results while using your flash to fill in light.

Understanding your equipment.
Todays camera equipment can be very technical and does require you to read and understand the manuals.
You can find many on line tutorials that will help show how to use all the features your camera offers.
Spending a little time learning the way your camera works will help make your photos keepsakes you
will want to cherish for the rest of your life.
You can find many on line tutorials that will help show how to use all the features your camera offers.
Spending a little time learning the way your camera works will help make your photos keepsakes you
will want to cherish for the rest of your life.


 RSS Feed